
Quick Answer
603 Basement Solutions evaluates the whole support path before foundation repair in Framingham, Massachusetts for settlement, inward wall movement, uneven floors, failed columns, and damaged sills or beams. The appropriate plan can involve piers, a wall system, support-column work, beam or sill replacement, narrow crack treatment, or documented monitoring. There is no charge for the initial inspection or written quote.
Separate the original house, addition, and garage before pricing repair
A low floor can cross several construction zones. One support plan should not assume that every zone carries load in the same way.
We trace each section to its own beam, posts, walls, and bearing. Then we connect only the parts that measurements show are related.
Framingham housing context without the guesswork
The 2023 American Community Survey places Framingham’s median housing year at 1964. That citywide midpoint cannot date one house, addition, or garage.
Bring plans, permit records, and renovation photographs from the actual address. They can reveal where framing or foundation lines change.

Foundation Problems, Inspection Points, and Possible Repairs in Framingham
| What you are seeing | What 603 inspects | Possible repair |
|---|---|---|
| One wall line no longer matches earlier elevations | Follow the settled section from rooms above to its contact with the ground | Stabilization below the footing may apply to the measured section |
| A stair-step pattern appears with wall displacement | Document deflection while reviewing masonry condition and water management | Carbon fiber, steel bracing, or another designed system may apply |
| Joists deflect where they meet a beam, wall, or support | Define damaged material and identify what must be held during repair | Column, beam, sill, or footing work may restore the support path |
| One concrete opening leaks after rain | Compare the repaired area with measurements from adjacent walls and floors | A reopened patch may require monitoring or a broader repair rather than another cover |
The inspection connects the visible clue to the part that actually needs support.
Put the visible clue in the right lane
A floor changes near an addition
Map both framing directions and the connection before adding support.
The garage slab sits beside the concern
Keep slab condition separate from the house load path until evidence connects them.
An opening replaced a wall
Identify the header, beam, posts, and bearing below its ends.
One foundation section cracks
Measure that wall without assigning the same movement to every zone.
Draw the zones before the symptoms
Outline the original footprint, additions, garage, porches, and major openings.
Use separate labels for each structural section. Shared finishes can hide different framing and bearing below.
Trace every handoff
Follow joists into beams, beams into posts or walls, and each support into verified bearing.
A repair belongs at a weak handoff, not merely below the place that feels lowest.
Price by treated section
Place each column, brace, pier, or replaced length on the zone drawing.
Keep engineering, access, temporary support, utilities, and restoration visible beside the structural units.
Give every footprint its own evidence sheet
Start at the oldest known footprint and mark its perimeter. Add later wings, enclosed porches, garage connections, and wide openings from address records. Use current framing observations to test that history. A date alone cannot prove how two sections transfer load. Keep uncertain boundaries dotted until selective access or documentation confirms them.
Compare transition readings in pairs
Place matching elevation points on both sides of a suspected seam. Pair wall readings at the same height and photograph both faces when accessible. The useful comparison is not which side looks older. It is whether the measured change stops, continues, or shifts direction across the connection.
Assign repairs to the component that carries load
A column belongs beneath a verified beam location. A brace belongs on a measured moving wall. A pier belongs beneath a defined foundation section. Mark each component on the Framingham zone drawing. If one unit moves during planning, revise the load-path explanation before installation.
Lay out Framingham floor support by bearing
Map joists, beam condition, posts, top connections, bases, and verified footings before choosing locations.
603 lally columns range from $1,300 to $2,500 each. Treated support carries a 10-year settlement warranty. Price beam work and adjustment separately.
Measure the complete Framingham wall
Record wall height, curve, displacement, restraint, openings, utilities, and the exact treated length before placing components.
603 power braces are $1,300 each and carbon-fiber straps are $850 each. The treated wall section carries a 25-year warranty within written limits.
Define the Framingham pier section
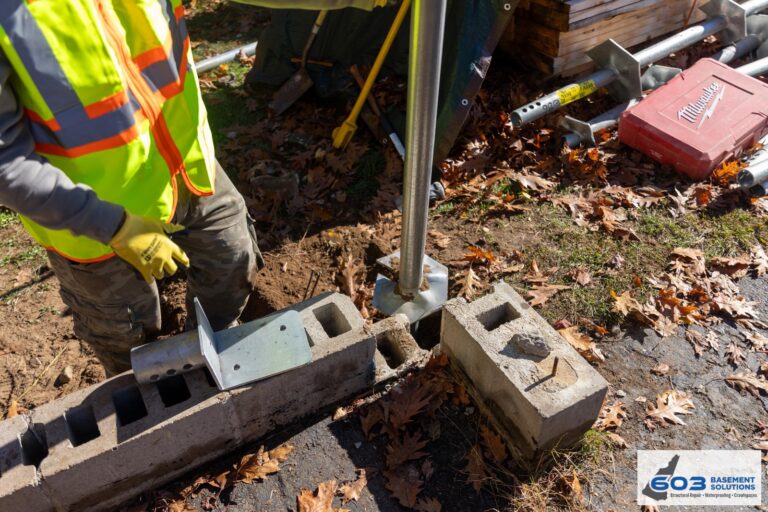
Connect interior evidence to one exterior footing section. Show brackets, access, utilities, quantity, restoration, and the movement target.
603 charges $2,700 each for the first three helical piers and $2,200 for later units. Engineered work carries a 25-year warranty.
Track multi-zone work by phase
Give each phase its own starting readings, access plan, quantity, completion test, and price. State which later phase depends on it. A shared mobilization can save effort, but it should not merge unrelated structural outcomes. Finish one evidence packet before the next zone changes.
Leave a map for later renovations
Add final support locations, no-drill areas, concealed connections, and inspection access to the property file. Note which old floor slopes or finish cracks remain. Future kitchen, garage, or addition work can then begin with the actual load-path record instead of a verbal history.
Audit the structural seams
Walk each footprint boundary at basement, floor, and exterior levels. Compare framing direction, wall alignment, beam ends, and grade without assuming one cause.
Create a seam schedule with location, observed change, supporting measurement, and next decision. An addition line may need monitoring while a beam support needs immediate work.
Keep separate estimates for every zone. Combine mobilization only after the structural scopes are individually clear.
Carry zone labels into closeout
Photograph each installed component with its original footprint label. Repeat the floor and wall readings on both sides of every treated transition.
List old slopes and cracks that remain. A repaired support line should not be described as a complete cosmetic reset.
Give the homeowner one plan that preserves all zones and their different outcomes.
Use one legend across the whole property
Choose simple codes for original footprint, addition, garage, wall, beam, post, and footing. Put that legend on every drawing and photograph set. Record which source established each boundary. A permit plan may suggest a date while field framing confirms the present connection. When those records disagree, keep both and identify the open question. Repeat the legend in proposals, change orders, and final warranty documents. This prevents a later project from confusing a shared room name with the structural zone that actually received work.
Check the handoff after one season
Return to the fixed points closest to the treated transition. Repeat readings with the original tool and surface. Note any new renovation or finish work. File the result under the same footprint labels.
Framingham inspection worksheet
- Map the Framingham footprints. Mark every construction zone and the rooms that cross its boundary.
- Measure both sides. Save floor elevations, wall readings, openings, and support locations across each transition.
- Choose one owner per symptom. Assign the observed change to a wall, beam, floor system, or foundation section.
- Close each zone separately. Record installed quantities, final readings, photographs, and open work by location.
Framingham foundation questions
Can an addition settle differently?
It can, but the inspection must verify the actual connection and bearing.
Does a crack at a transition prove settlement?
No. It is evidence to measure, not a complete diagnosis.
Can one proposal cover several zones?
Yes, when each zone has its own measured boundary and outcome.
Where does a stable crack belong?
Use the Foundation Crack Repair service when the wall remains stable.
What 603 brings to the inspection
603 is licensed and insured, has worked in more than 5,000 homes, and self-performs helical-pier installation and structural lifting. The inspection and estimate are free. We normally send the written quote within 24 hours.
We will tell you when the house needs a smaller repair or a period of monitoring. If work is proposed, the scope should name the treated area, quantities, outcome, exclusions, and warranty.
Why Homeowners Choose 603 for Foundation Repair
For a Framingham homeowner comparing contractors, the review and field evidence below show how 603 handles the work.
Get the Framingham load path checked
We will measure the structure, explain the repair boundary, and give you a written scope you can compare.
Sources: U.S. Census Bureau, 2023 ACS 5-year table B25035. The city image caption links its Wikimedia Commons source and license. 603 supplied the confirmed service, pricing, warranty, and operating information. Work imagery shows a 603 repair method. See Structural and Foundation Repair or the Foundation Crack Repair service.